For all of you who blog out there, which set of grammatical rules do you go by? MLA, Bluebook, what you've been forced to learn/unlearn from your place of work? Just curious, as I always feel weird about my capitalization of titles. Am I doing it right, I do apologize if I do miss something on the grammatical front- I do tend to type late at night. Moving on, so as we all know, I was inspired by Kate Spade's spring line. Especially this dress
Oh those balloons! How I love those balloons. In my mind I was going to take my interpretation one step further and do an entire landscape of balloons on my dress. Well, that didn't happen, but I love it anyway.
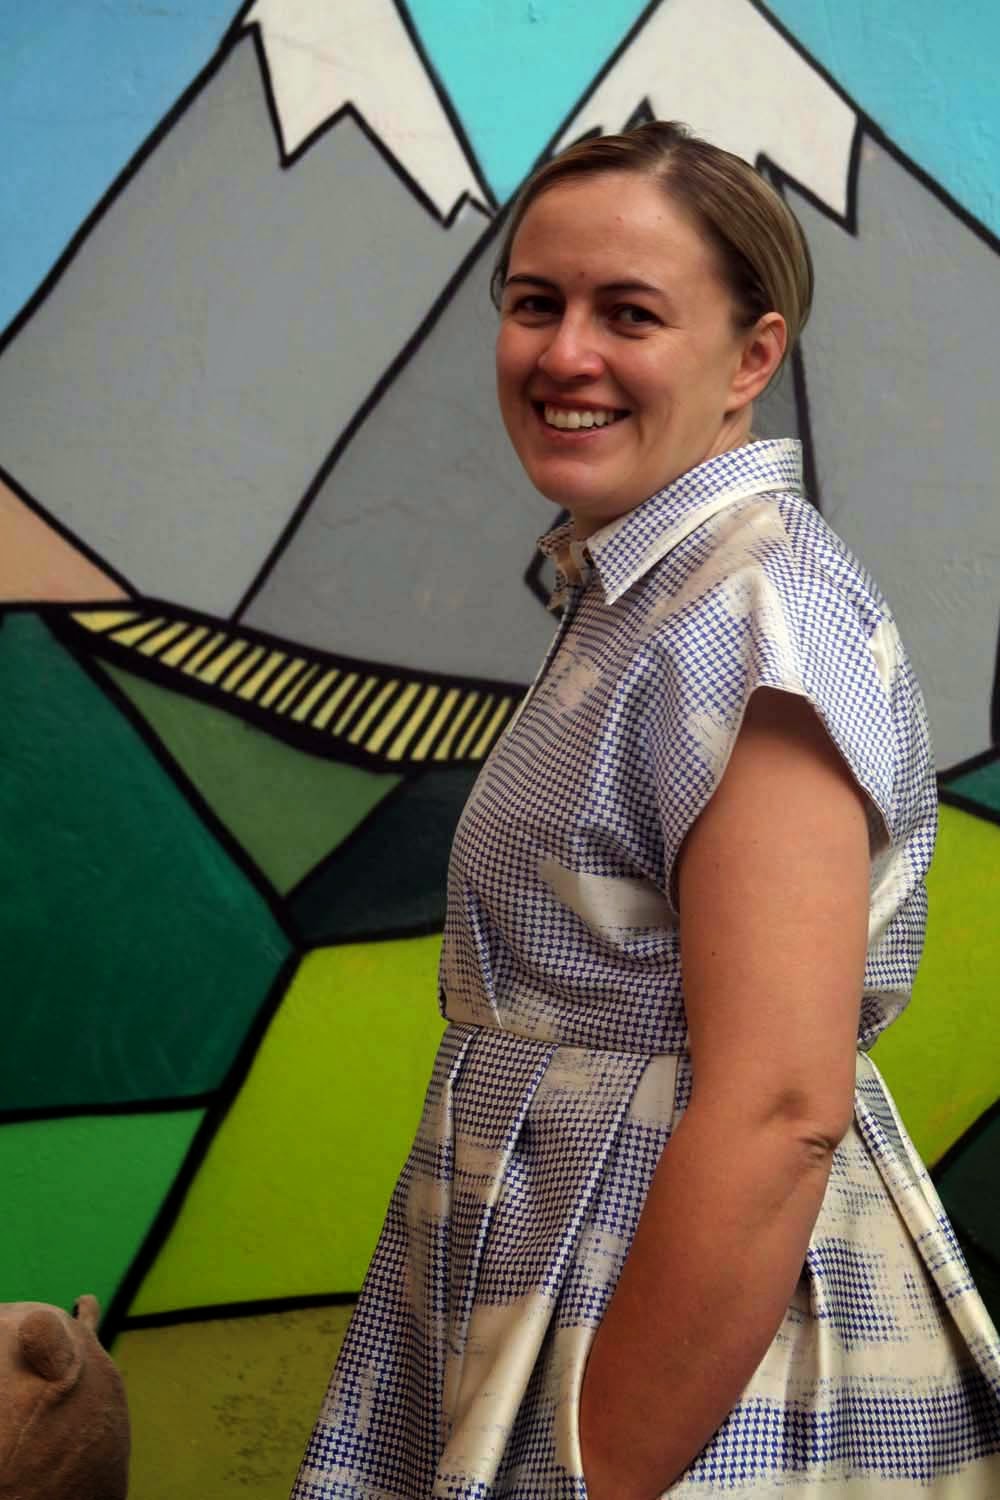
 I used the Bellini top by Capital Chic patterns, with the collar being Burda 7376, and then three rectangles for the skirt. Oh and pockets are from a Deer and Doe pattern. The fabric is a silk charmeuse that I bought a year ago at Mood Fabrics online. It's mini-houndstooth. In order to get a similar oomph that the Kate Spade dress has, I underlined it with a cotton batiste. The buttons, though are handmade. Shrinky-dink!

Let's take a closer look at the buttons. If you couldn't tell they are hot air balloons. I made two rounds of buttons. The first round I used colored pencil and paint markers on the frosted shrinky-dink. Which I liked, but I made the balloons too small, so they got lost against the pattern. Round two- white shrinky-dink and permanent markers. To punch the holes I used a star hole puncher. It's important to remember to poke the holes before hand. In order to ensure that they won't scratch (or wash off) a coat of clear nail polish after they are shrunk.

Here's the back. The changes I made to the Bellini pattern were I straightened out the shoulder curve, combined the facing to with the shirt fronts to fold over, trimmed the facing so that the placket would be about an inch wide, and hacked off the bottom to make it into a dress. The length of the front is a tiny bit too short, but that's because I cut the back with only 2.5 inches of length, the back looks great though right?
 I even added back an inch in the front. I should have added more, and made a side dart. Next time! The skirt is just three rectangles, two for the upper part (front and back) and then one continuous for the bottom. I added pockets (which are about 1.5 inches too low), so this required side seams. The pleats are 2.5 inches, it worked rather conveniently. The inspiration dress did not have pleats in the back, but I added the so it would look more balanced.
 The dress in motion. It is really super comfortable to wear. I didn't add a side zipper, as I am lazy and didn't want to be tempted by the fabric store, so I ensured there was enough easy to pull it on. To match the top to the bottom, I pulled in pleats until it worked.
 Let's talk underlining- I cut the charmeuse first, and then laid it on the batiste right sides together. I smoothed it out, and only pinned one side (sometimes two) together. I sewed a quarter inch seam on most the sides, but leaving one side completely open. I turned them right side out and then ironed it flat. I then sewed the last side shut and folded it over. This seemed to work well. I then sewed the dress with quarter inch seams.
 I don't know if you can see it, but there was a lot of hand sewing in this dress- the plackets, the inside of the collar and the hem. I only caught the underlining with the stitches, so completely invisible on the outside.

The too low pockets! To make it look pretty, I sewed them to the charmeuse before I underlined it. I used bias binding to finish them. You can also see my hand sewn hem. Lots of hem- I think it was about 92 inches- so a little under eight feet? I ironed the hem and sewed it at the same time. This saved pinning it.
 I had a different collar for the dress, but it didn't work out. I made the mistake of interfacing the gold charmeuse, which was also painted, so the collar was way to stiff. I tore off the interfacing, and scraped off the glue, which would have worked but...
 After spending 40 minutes on it, I tore the under collar. Sewing fail! The next morning, I cut a new collar, and re-did it. This is why I was sewing it until 10 pm on Saturday night. The gold undercollar and collarstand would have been cool. I was thinking that they were kind of like the sun?
Well enough of the talking- here are more pictures of the dress. And the buttons.


Although not as surreal as my original thoughts were, definitely a fun dress to wear. We'll see what my colleagues at work think! Until next time, happy sewing.
 |
| Found here at KateSpade.com |
Let's take a closer look at the buttons. If you couldn't tell they are hot air balloons. I made two rounds of buttons. The first round I used colored pencil and paint markers on the frosted shrinky-dink. Which I liked, but I made the balloons too small, so they got lost against the pattern. Round two- white shrinky-dink and permanent markers. To punch the holes I used a star hole puncher. It's important to remember to poke the holes before hand. In order to ensure that they won't scratch (or wash off) a coat of clear nail polish after they are shrunk.
Here's the back. The changes I made to the Bellini pattern were I straightened out the shoulder curve, combined the facing to with the shirt fronts to fold over, trimmed the facing so that the placket would be about an inch wide, and hacked off the bottom to make it into a dress. The length of the front is a tiny bit too short, but that's because I cut the back with only 2.5 inches of length, the back looks great though right?
The too low pockets! To make it look pretty, I sewed them to the charmeuse before I underlined it. I used bias binding to finish them. You can also see my hand sewn hem. Lots of hem- I think it was about 92 inches- so a little under eight feet? I ironed the hem and sewed it at the same time. This saved pinning it.
Well enough of the talking- here are more pictures of the dress. And the buttons.
Those buttons are FANTASTIC!! I love it. What an accomplishment with all of that lining and hand-sewing!
ReplyDeleteReally, a lovely job. Your photos and story bring it to life, too. I'm an MLA girl at heart, and I over contemplate title capitalization; I like what you did here.
ReplyDeleteIt's a houndstooth! How fun! I love it! The buttons go so well with the fabric and everything! All that hand stitching! Great job!
ReplyDelete