Saturday, February 21, 2015

Colette Rooibos + Simplicity 1699

Good afternoon!  I finally finished a make- only several weeks later.  Well, to be exact I finished two makes that I was making simultaneously.  With doing so, I used up some of the oldest fabric in my stash- fabric I bought while still in DC, all the way back in 2009/2010.  So let's take a look and get into the nitty gritty.  We'll start with the dress- Rooibos by Colette.
I'll be honest and say that I didn't notice that the two little flaps were not staying down in the pictures, I'll have to go back and tack them down.  I actually made several muslins of the bodice, as even with being drafted for a curvier lady, their bodices do not fit right out of the package.  I started with the size 6 for the back and shoulders and then doing a full bust adjustment to meet up with the size 10 front waist and front skirt.  This tends to work out best for my shape.  Even with the size 6 in back, I had to take more out of the neckline.  (I was overzealous, so the back ended up being a tiny bit snug).  I also had to add more to the front bust.  I probably could have added another half inch in length on the upper bust, but oh well.  The other changes I made was to start with the largest size for length (added a couple of inches).  It still was too short, so I added a 3.5 inch band at the bottom of the skirt.

Oh and another change I made was I added sleeves!  I used the pattern for Colette's Laurel dress.  I had to take some of the ease out of the top, but they fit in pretty well.  If you are thinking that you recognize the main fabric, yes, it's the last of the wool/cashmere I bought last year for my Marine Ball gown and Sewing History's trousers.
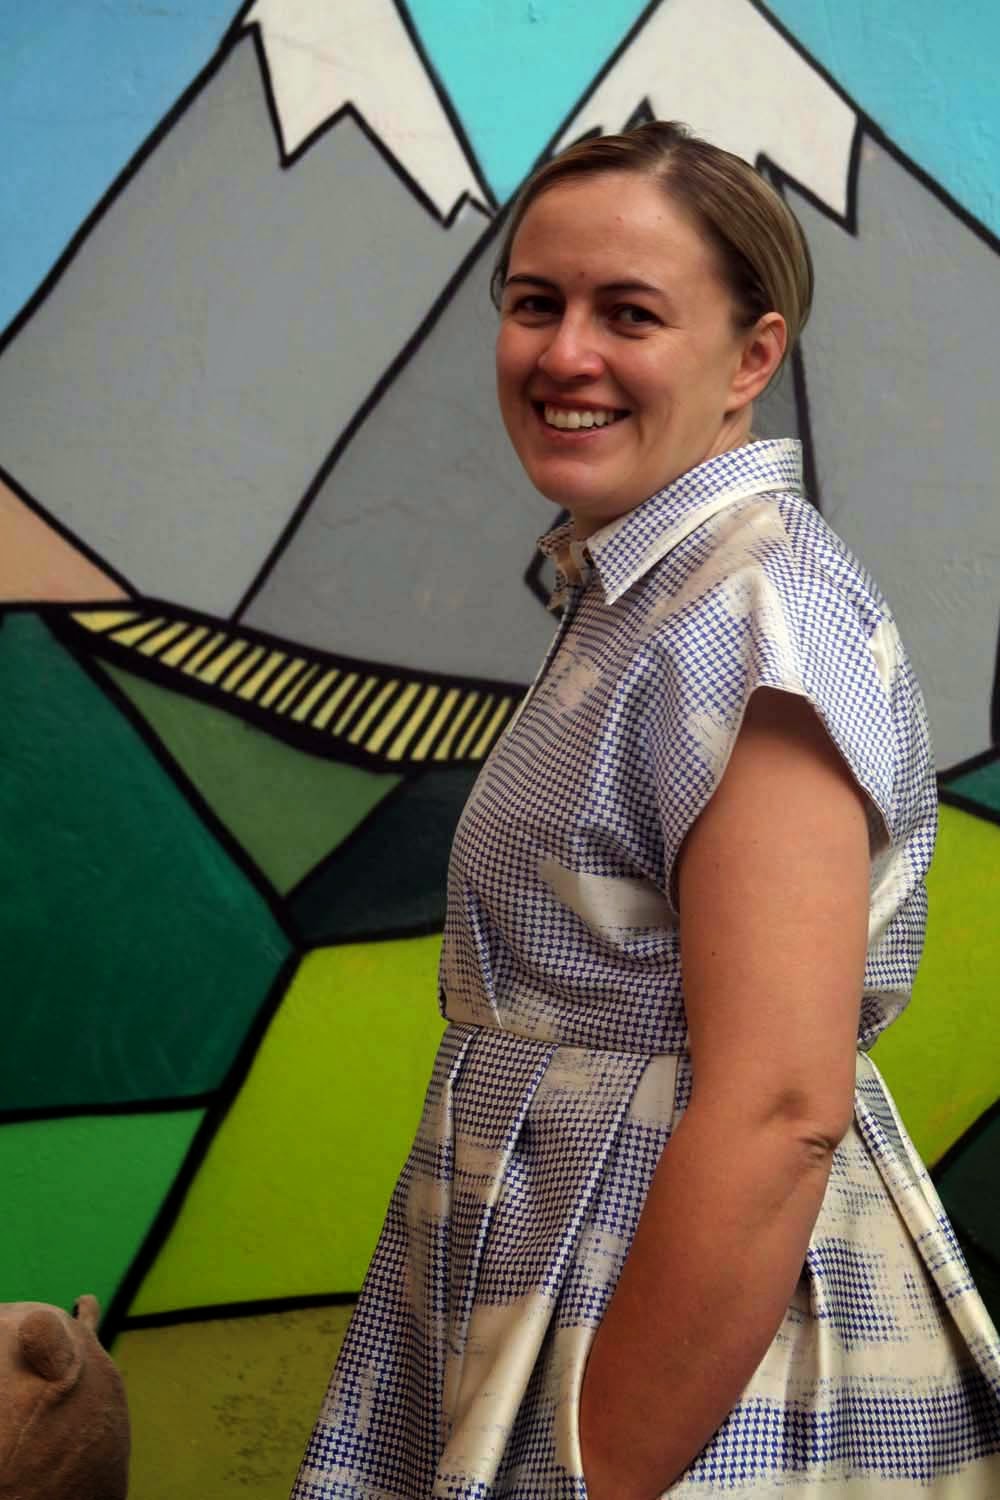
For the contrast piece, I used a woven piece of silver silk with pops of bright colors.  It doesn't photograph very well, but looks nice.  You can really tell in this picture that the collar piece is sticking up.  Bad Nicole!  I should double check before I take photos.
Here is about the clearest shot of both the contrasting fabric and the little collar. Not to shabby eh?
Well, when I bought this fabric, I was in Russian class in DC and my sewing machine was in storage, so with it, I made a skirt by hand.  (I was desperate to sew, as I hadn't sewn in months!)  The skirt ended up being too big, so I never wore it.  I decided to take it apart and make a simple jacket out of it.  Much more useful right?
Here is what I ended up with.  Simplicity 1699, a super simple jacket with only side bust darts.  As it's drafted there is no closure, but I added strips of the fabric so that I could tie it together. 
The shaping in the back is done by center seam.  It could almost use some more shaping, but I think I like it a little boxy.  I did just ok on the pattern matching. The front is spot on, but the back is only half matched.  Oops!  In my defense, I did have to be a little creative with the placement to make sure I had enough fabric.  To give the jacket some structure, I interfaced the whole thing. This made sewing it a breeze.
It is fully lined, the only change I made was added facings to make sure that none of that turquoise could be seen on the outside. For the facings I used the wool/cashmere from the dress.  I can say with certainty that I only left tiny scraps of the wool.  Anything else about the jacket, oh yeah, I made a straight size 14.
The only comment I have is if I make the jacket again, I will stick some weights in the hem that the front hangs a little better.  Anyway, that's my newest make, I won't actually get to wear any of it for a week, as I am on vacation!  Tomorrow my family is off to Venice, with a day in Florence.  And you know what that means?  According to my resolution, I can spend $100.00 on fabric during the trip.  I am hoping to find a nice denim, as I really need some new jeans.  (And can you believe it, I haven't bough any fabric in almost two months, I have really bee good about ignoring those Mood and Gorgeous fabric emails.)  Anyway until next time Happy Sewing!  Or felice cucito, I thought it would be bon cucito?  My Italian is non-existent!  

P.S.  Do you go fabric shopping on vacation?  What's the coolest thing you've bought? I hope I'm not the only one who loves fabric shopping in other countries.

Thursday, February 12, 2015

UFO number 2- the Sally Shirtdress

Good evening, I don't think that I ever defined what an UFO is in my last post (a large cross-section of my readers are non-sewistas- hi mom!- and therefor might have been scratching their heads).  An UFO is an unfinished object.  In this case- it's my second oldest UFO.  I am fuzzy when exactly I cut it out, but I think fall/winter 2013, as I bought the fabric on my day trip to Nizhny Novrogorod, which was August 2013.  The pattern was bought on one of my trips back to the homeland of Kansas, so either sometime in 2012 or September 2013. Hmmm, I wish my memory was better....
Moving on,  the pattern is the Sally Shirtdress by Serendipity Studio.   Found here.  The fabric is a super dark grey (almost black) wool pinstripe, found at that random fabric store on a day trip to the middle of BFE Russia.  The fabric is the same a one of my many Angelina Jolie inspired looks.  I honestly don't remember what size I cut, but likely looking back at the measurements it was a medium.
The pattern and most of the Serendipity Studio line is meant to be made with quilting cottons, I obviously ignore that for my love of pleats.  How it is put together was really interesting, and likely that is why I didn't finish it until now.  First- the collar has no stand, so you finish the placket edge and then sew on the collar.  It's likely not a collar option I will repeat.  Unless you interface the hell out of the fabric and/or use a fabric like quilting cotton, it will be a floppy-ish collar..
Second, not shown, is that the placket is folded over, but only once.  This creates a flappy placket (unless of course you interface it immensely).  I don't remember if the instructions have you fold under a quarter-inch to finish it or to just serge it or had no information at all, but obviously, I chose a bias binding finish in hot pink to play off the gray.

My third meh about the pattern was the length.  It's slightly above knee, so it skewed a little juvenile to me.  You can add a band to make it below knee, but apparently past me didn't choose to do that.  
But, there were positives- the shoulders and the bust were a perfect fit straight out of the envelope.  The pleats were not marked, but you were told how to make them, so you just fit them to your waist.  Using the pinstripe made pleating even easier, as I adjusted the pleating to match the pinstripes.  Each pleat, except for the middle back, was three pinstripes wide with seven between them.  I marked a straight light at waist height and sewed them two inches above and two inches below.  If I were to make the again, I would sew it likely 1.5 inches above and two inches below. 
I used a color pencil to mark the pleats.  The light blue showed up extremely well.  And the pinstripes made it easy to make a straight line, but you can see that even I had to fix a line.  You can also see that I used french seams for all the seams.
Overall, I like the dress, but as one of my colleagues said today- it's rather utilitarian.  Even with the pink bias binding, I felt rather meh in it.  But, there was one saving grace.  You might have seen it in an earlier picture.

I'll let you look at another picture- goofy one right?  But it shows the....... new shoes!

 They're by Poetic License, which as far as I can tell is a sub-brand of Irregular Choice, but unlike my pair of those they are totally wearable.  The houndstooth doesn't photograph well, it is likely that they are slightly iridescent.  Which is a win in my book.
 They are also one of my favorite colors for shoes- oxblood.  Or if you're into Pantone's color of the season- marsala.  I looooove the deep rich red.  It is so much more wearable than true red.

 One last picture of the shoes.  They do really make me happy, I likely wear them out like my last pair of oxblood shoes.  Have you bought new shoes lately?  I've also bought a pair of straight black shoes and boots, but they are sitting in my office at work.  In the next couple of weeks I'll show them off.  Anyway, as you've seen my little photobomber in most pictures, I might as well show you one of him.  He's turning two tomorrow, amazing, I can't believe it's been so long.
He's playing in his early birthday present (he carried it out of the car when I brought it home from work- oops!)  Hopefully, even with his party and extra play time, I'll have time to sew the Rooibos dress this weekend.  Anyway, until next time, happy sewing!

Tuesday, February 10, 2015

Stashbusting- UFO Style

As I continue to abstain from buying fabric, I decided that I should really finish projects that I started and never finished.  This is my theme for this week- or this month, as I started on finishing my UFOs early last week.  My job has been super busy lately- last Thursday I was working from 7:15 AM until almost 10 pm.  If you have read the news about where I live or we're facebook friends, you'll understand why it's been so busy.  Anyway- I figured that I could work on projects that were already cut out and partially finished.  That way I could keep sewing, even if is just for 15 minutes while my kids are swimming in our bathtub.  And now onto the sewing- this make was started sometime between me-made May 2013 and me-made May 2014.  I am pretty sure it was sometime in the fall of 2013, but I couldn't tell you for sure.  I had four yards of the purple wool, and out of it I cut and sewed a jacket and skirt Burda 7576, Colette Clovers, and started a Colette Laurel jumper.  The shell was sewn, the lining half sewn, and then I got distracted by something shiny or heavily floral patterned.
It is now fully sewn up.  While it's one of my more simple makes, I believe it will be worn with great frequency.  It's super easy to wear, and pretty comfy to boot.  The pictures were taken post work and post dinner, so that is where the wrinkles come in.  I was also battling Alex for picture taking ability.  He loves playing with my camera remote.
As seen here.  This is how I wore it.  The sleeves of the blouse I wore underneath shrunk a bit, making them a bit to snug (either that or the circumference of my arms grew, nah we'll stick with the shrinking), so I wore it with the jacket on all day.

A back view, nothing much to comment on- invisible zipper and some dartage.  I believe I made a straight size 6 with no alterations, but at this point who knows?  It really wasn't that hard to finish- maybe a couple of hours, so why didn't I finish it before?  Likely it was due to having to sew the lining.  Linings, while a necessity, are not very much fun to sew. 


But look how pretty it looks?  Sometimes it's worth the extra work, right? Well that's basically it.  I could talk about understitching (really makes a difference), inserting the lining, or handstitching (visible or invisible?), but I am not sure if anyone is interested in any of that.  Plus, I am almost finished with another UFO, so I'd like to try and get it done.  I will leave you though with a question- I plan on making Colette's Rooibos dress with sleeves (as it's still winter and seems like it will always be winter).  I spent all day Sunday working on a muslin and starting it with a grey houndstooth fabric, but stopped pretty early on as the fabric was just not working.  It was super shifty and not able to stay on grain, so impossible to match and was going to look terrible.  I realized I have enough out my favorite grey wool cashmere for the shell, but which one of the three for the contrast.  Let me know in the comments which one you think would work best.  The fabric in the back is the wool cashmere.  The two blues are both silk- the plaid one is pretty light, the one on the right is a raw silk- and I believe would qualify for the oldest piece of fabric in my stash.  The one in the middle is many different fabrics woven together.  Let me know in the comments which one you think would work best!

Oh and one more outtake with Alex taking the picture
Until next time happy sewing.

Monday, February 2, 2015

Hot Air Balloons don't only belong to Kate Spade

For all of you who blog out there, which set of grammatical rules do you go by?  MLA, Bluebook, what you've been forced to learn/unlearn from your place of work?  Just curious, as I always feel weird about my capitalization of titles.  Am I doing it right, I do apologize if I do miss something on the grammatical front- I do tend to type late at night.  Moving on, so as we all know, I was inspired by Kate Spade's spring line.  Especially this dress
Found here at KateSpade.com
Oh those balloons!  How I love those balloons.  In my mind I was going to take my interpretation one step further and do an entire landscape of balloons on my dress.  Well, that didn't happen, but I love it anyway.

I used the Bellini top by Capital Chic patterns, with the collar being Burda 7376, and then three rectangles for the skirt.  Oh and pockets are from a Deer and Doe pattern.  The fabric is a silk charmeuse that I bought a year ago at Mood Fabrics online.  It's mini-houndstooth.  In order to get a similar oomph that the Kate Spade dress has, I underlined it with a cotton batiste.  The buttons, though are handmade.  Shrinky-dink!

Let's take a closer look at the buttons.  If you couldn't tell they are hot air balloons.  I made two rounds of buttons.  The first round I used colored pencil and paint markers on the frosted shrinky-dink.  Which I liked, but I made the balloons too small, so they got lost against the pattern.  Round two- white shrinky-dink and permanent markers.  To punch the holes I used a star hole puncher.  It's important to remember to poke the holes before hand.  In order to ensure that they won't scratch (or wash off) a coat of clear nail polish after they are shrunk.

Here's the back.  The changes I made to the Bellini pattern were I straightened out the shoulder curve, combined the facing to with the shirt fronts to fold over, trimmed the facing so that the placket would be about an inch wide, and hacked off the bottom to make it into a dress.  The length of the front is a tiny bit too short, but that's because I cut the back with only 2.5 inches of length, the back looks great though right?
I even added back an inch in the front.  I should have added more, and made a side dart.  Next time!  The skirt is just three rectangles, two for the upper part (front and back) and then one continuous for the bottom.  I added pockets (which are about 1.5 inches too low), so this required side seams.  The pleats are 2.5 inches, it worked rather conveniently.  The inspiration dress did not have pleats in the back, but I added the so it would look more balanced.
The dress in motion.  It is really super comfortable to wear.  I didn't add a side zipper, as I am lazy and didn't want to be tempted by the fabric store, so I ensured there was enough easy to pull it on.  To match the top to the bottom, I pulled in pleats until it worked.  

Let's talk underlining- I cut the charmeuse first, and then laid it on the batiste right sides together.  I smoothed it out, and only pinned one side (sometimes two) together.  I sewed a quarter inch seam on most the sides, but leaving one side completely open.  I turned them right side out and then ironed it flat.  I then sewed the last side shut and folded it over.  This seemed to work well.  I then sewed the dress with quarter inch seams. 
I don't know if you can see it, but there was a lot of hand sewing in this dress- the plackets, the inside of the collar and the hem. I only caught the underlining with the stitches, so completely invisible on the outside.


The too low pockets!  To make it look pretty, I sewed them to the charmeuse before I underlined it. I used bias binding to finish them.  You can also see my hand sewn hem.  Lots of hem- I think it was about 92 inches- so a little under eight feet?  I ironed the hem and sewed it at the same time.  This saved pinning it. 


I had a different collar for the dress, but it didn't work out.  I made the mistake of interfacing the gold charmeuse, which was also painted, so the collar was way to stiff.  I tore off the interfacing, and scraped off the glue, which would have worked but...

After spending 40 minutes on it, I tore the under collar.  Sewing fail!  The next morning, I cut a new collar, and re-did it.  This is why I was sewing it until 10 pm on Saturday night.  The gold undercollar and collarstand would have been cool.  I was thinking that they were kind of like the sun?

Well enough of the talking- here are more pictures of the dress.  And the buttons.  


Although not as surreal as my original thoughts were, definitely a fun dress to wear.  We'll see what my colleagues at work think!  Until next time, happy sewing.